页面

2018/1/17

TOP 10 SPRING NAIL ART YOU ARE GOING TO LOVE

The arrival of spring means so many things. For some it means planting pretty flowers, for others it means fun crafting and there are also some for whom spring means experimenting with colors and spring themes while doing your own mani.
In this article we are showing you ten beautiful ideas on spring nail art. From sugar spun to dry brush nail art, there is something for everyone’s taste. The most important thing is that all of these ideas are easy to make – it’s just up to you to use your imagination.

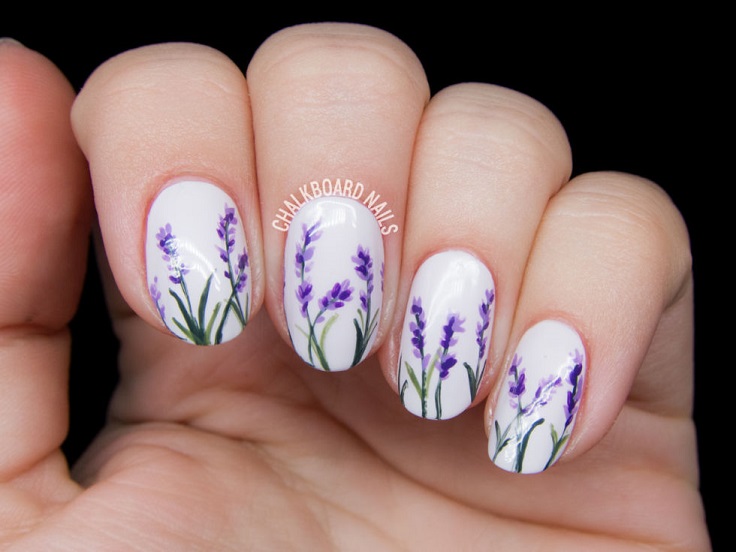
1. Lavender Blossom
Top 10 Spring Nail Art You Are Going to Love
Delicate and nice and just as much as the real lavender, these blossoms are very easy to paint. It’s very important to have the right nail brush – a super tiny one will work perfectly for the lavender blossoms, or you can just create this kind of brush by thinning down the bristles of a thicker brush with cuticle nippers.

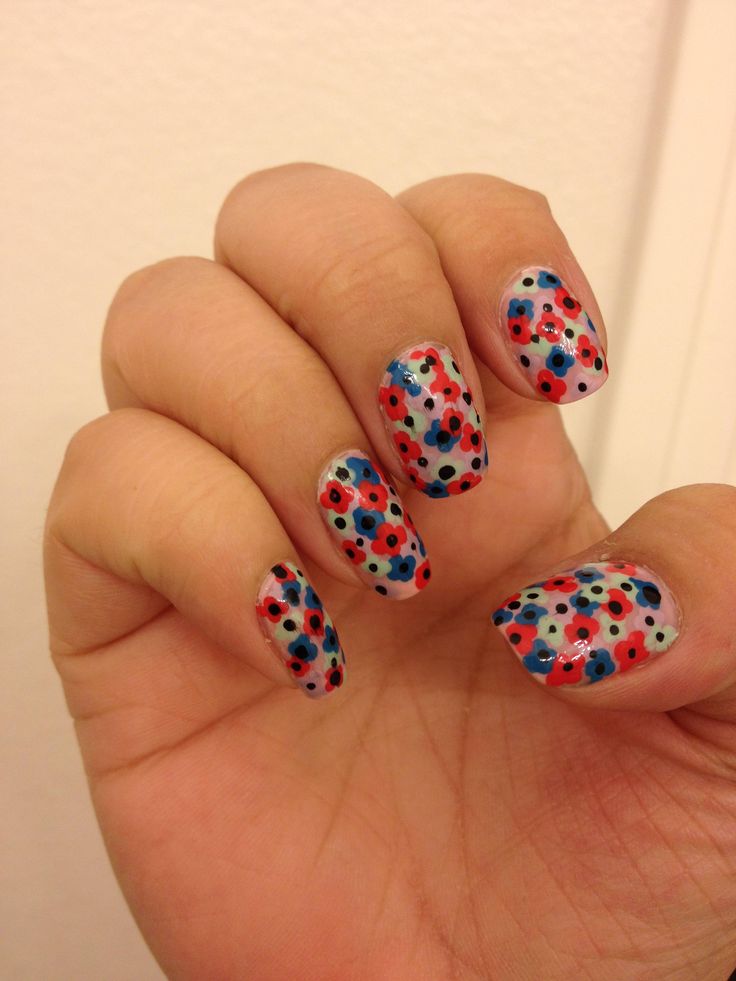
2. Wildflower Poppies
Top 10 Spring Nail Art You Are Going to Love
Wannabe poppies in red, white and blue can look amazing on a clear base coat. It’s really simple to come up with this nail art because all you need to do is just to paint dots and connecting them in a way that a flower will be created. You can use other colors besides these three – it’s all up to your imagination.

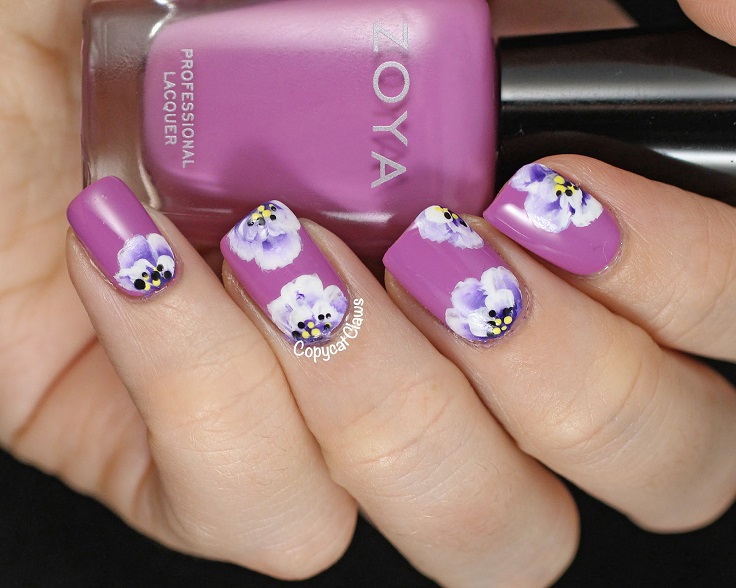
3. Radiant Orchid
Top 10 Spring Nail Art You Are Going to Love
One of the most beautiful floral nail art that you can come up with is exactly this one. If you admire the color so much, then you will completely understand why radiant orchid was chose as the Color of the Year by Pantone. That’s the color used as the base, while for the petals you’ll need white and purple acrylic paint and a small flat paint brush.

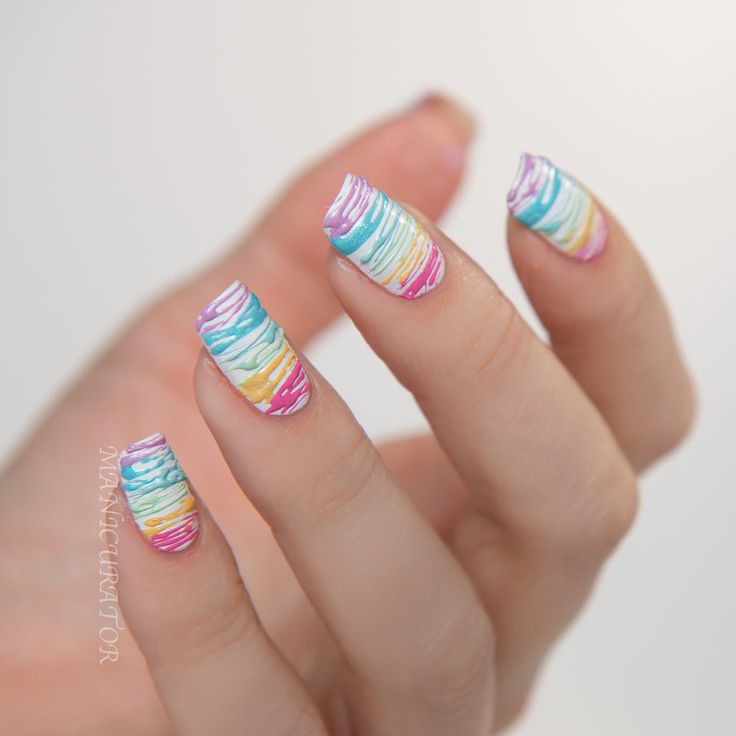
4. Pastel Sugar Spun
Top 10 Spring Nail Art You Are Going to Love
Sugar spun mani is very vibrant and playful nail art. All the movements with the color lines on the nails make them so hard to be missed! If you’re willing to try the sugar spun mani and make it inspired by spring, one of the best ways to do so is to use pastel colors and even use more colors than two! You can have a white base coat, or choose other color just be careful to not make it too much colorful.

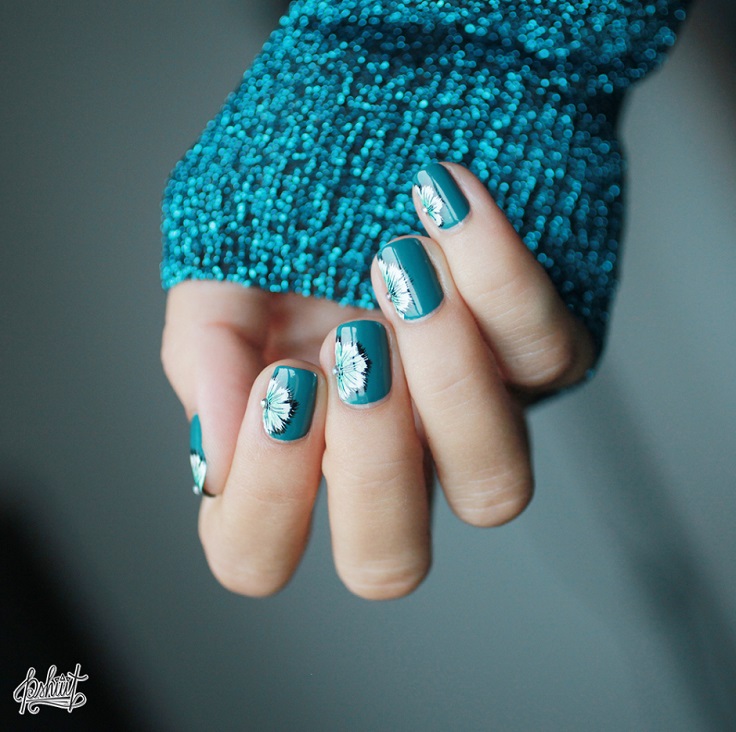
5. Teal Flowers
Top 10 Spring Nail Art You Are Going to Love
Teal color and flowers is a great spring combo. The tutorial for this nail art is in French, however even from the picture you can see that it’s easy to make it. Make your base coat in teal and use teal, black and white to create the flowers. Having a tiny brush will be really helpful for the petals.

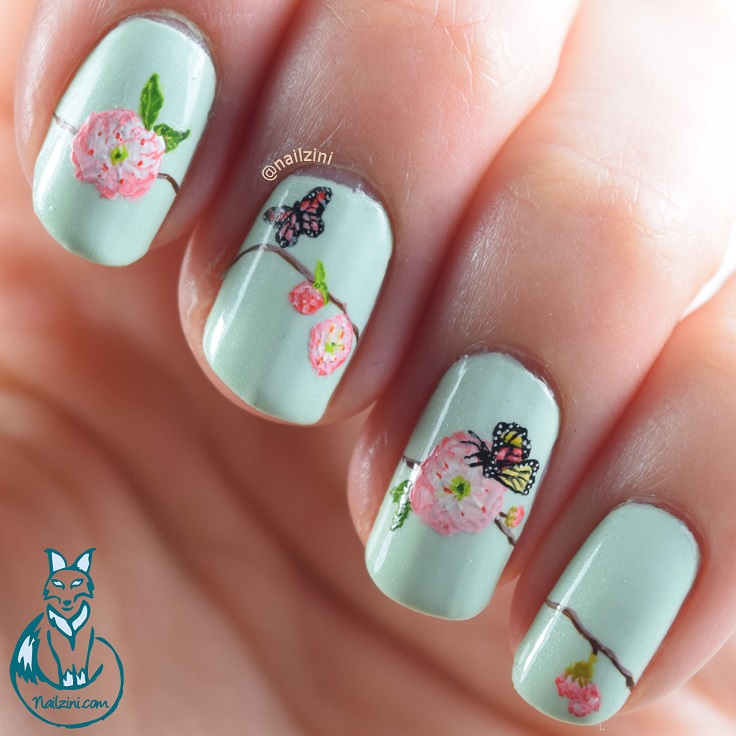
6. Butterflies on Blue
Top 10 Spring Nail Art You Are Going to Love
One of the things that spring brings with itself are the butterflies. These small creatures, no matter their color, can certainly spread some good spring vibes, so don’t hesitate to paint one on your nails. For this nail art, you’ll have to create one art on all nails – a branch, flowers and butterflies. Feel free to get creative!

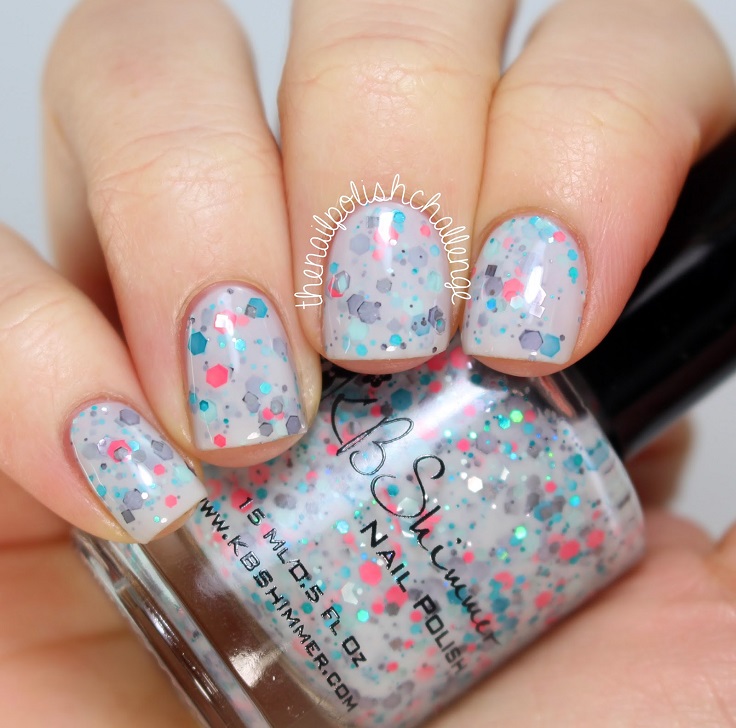
7. Spring Glitters
Top 10 Spring Nail Art You Are Going to Love
This is the easiest nail art on this list, as all you need to do is to pick a nail polish with glitters. There is plenty of choice when it comes to this! All you need to be careful about is choosing the right colors – if you choose something dark, it probably won’t send any spring vibes!

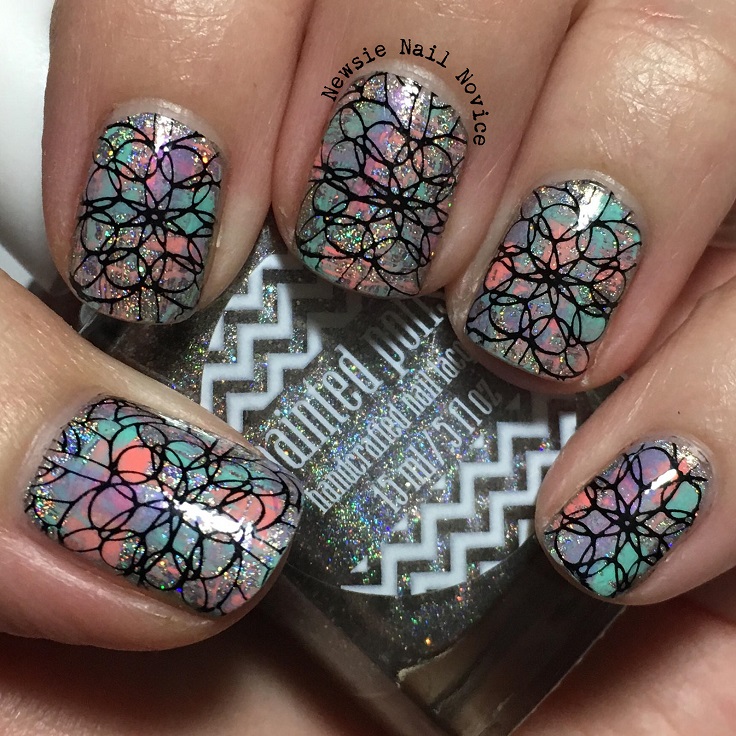
8. Dry Brush Nail Art
Top 10 Spring Nail Art You Are Going to Love
They look amazing, aren’t they? We fell in love with this nail art the moment we saw it! It isn’t the easiest tutorial on the list, but it’s definitely worth it. The trick behind this nail art is the use of dry brush. That means you need to take the nail brush and get as much of the polish off of it by running it back and forth over the open neck of the polish. It’s all about creating brush strokes!

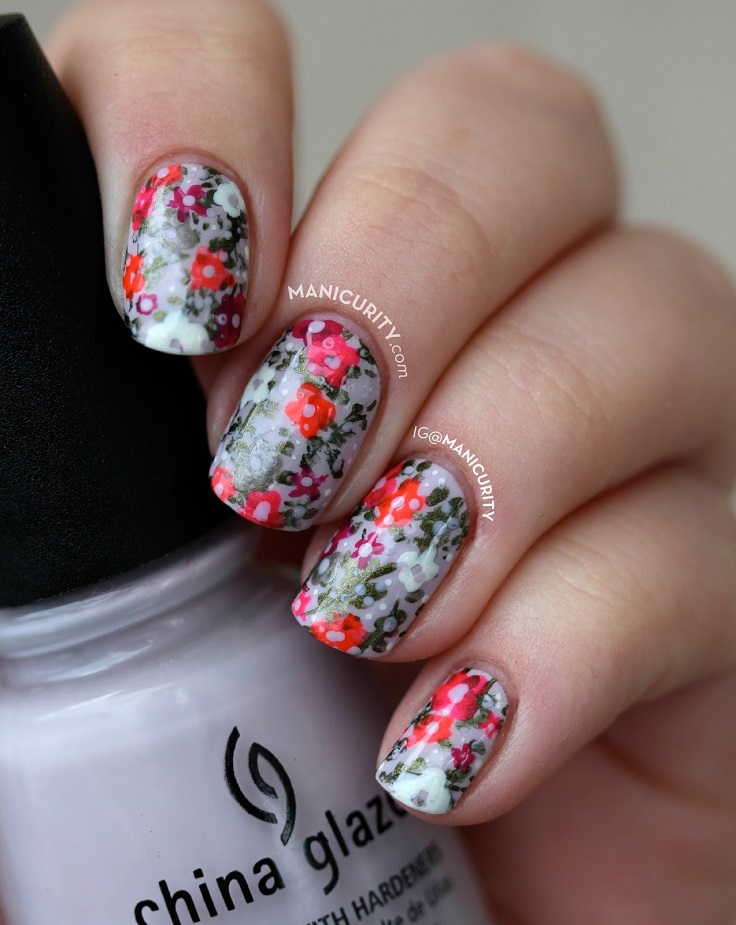
9. Neon Florals
Top 10 Spring Nail Art You Are Going to Love
As you already, nothing suits a spring – inspired nail art like a floral theme. There are tons of ideas that you can use and so many of them can be easily done. This nail art is a very good example. It is a combination of neutral and neon colors. The neon color is adding playfulness to the look and is also putting the focus on the flowers.

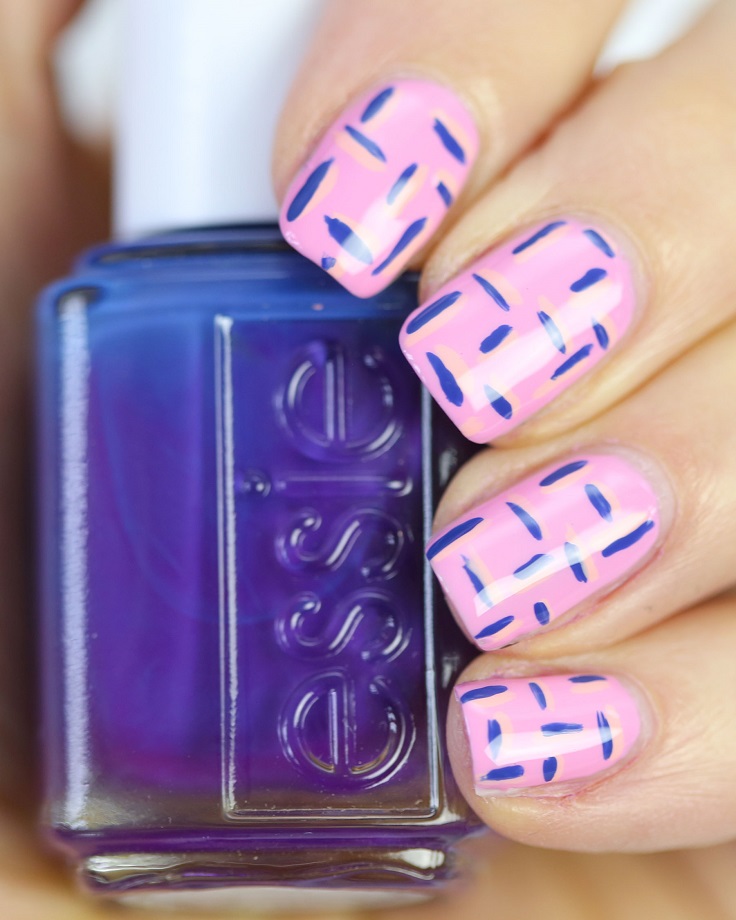
10. Fun Spring Lines
Top 10 Spring Nail Art You Are Going to Love

The last nail art idea on this list is totally different from all the rest we have already shown you. This is for all of you who aren’t really a fan of floral themes, pastels and glitters. After applying the base coat in a color by your preference, paint small lines in different directions. Voila!

Diamond Nails: How to Perfectly Bling You’re Nails

Plain nail polishes these days are still good, but if you are looking for a more modern nail polish, you have to try “nail art”. A “nail art” is a process that does not involve painting your nails, but it involves decorating or designing your nails. Over the years, nail art has been widely affecting how women value the importance of their nails and how they have to take care of them, since your finger nails are one of your best “built-in” accessories. Sometimes, it just takes pretty nails to complete your look.
So, if you are like me, the reason why you have reached this page is because, you wanted to find the best nail designs that would help you achieve the best bedazzled look. Well, you are not wrong. I will be sharing to you a simple nail design that would be perfect for any occasion. This design requires you to bling your nails and make you stand out.
Have you ever heard of diamond nails? If you were not born under a rock and you polish your nails once in a while, diamond nails might have just came across to you. Do not worry this does not include nail polished that would be around $250 per bottle. This look will only cost you a few dollars and loads of patience, but the result is just perfect.
So, to achieve the diamond nails, here is the list of what you would need.
-A good quality of small rhinestones, preferably a clear one for a more realistic diamond resemblance-A nail polish of your choice – Top Coat and Base Coat Orange Stick – Nail Polish Remover – Q-tips
How to have the best perfectly blinged diamond nails?
Before proceeding, let me remind you that you can do loads of design. The bling can be made as an accent nail or you can choose to have bits and pieces of your rhinestones on each nails. Whichever you prefer all method promises great results. After all, nothing could go wrong with bedazzled nails. For this article I am going to provide a step-by-step guide for a diamond nail design with the diamond nail as an accent nail.
Using the wider tip of an orange stick, push the cuticle of your nails back to have a neater finish. Do it on all nails. Once done, apply base coat to protect your natural nails. Apply the nail polish of your choice in all of your nails except the ring finger for your accent nail. Remember, you accent nail can be any nail of your choice. I always like my ring finger as an accent nail. On the ring finger, you can apply a top coat the nail to glue the rhinestones. Cover the whole nail with rhinestones. You might require adding a few coats of top coat to ensure that the glued stones are sturdy to last longer. Once the entire nail on your ring finger is covered. Apply a generous amount of topcoat on it to seal the stones. Apply also top coat to the rest of the fingers to seal the polish or design and to add a beautiful shine.
Now you have the best diamond nails. Remember this design is very flexible and you can add this design in all other designs to make your nails look elegant, modern, and posh. Good luck!
Find discount Nail Rhinestones Online at Beautybigbang. Free shipping worldwide!

2018/1/16

Top 5 Tips for Keeping Your Hands Forever Young

You can make your face look younger with makeup, dye your hair to cover the greys but what can you do to improve the appearance of hands? Well, actually quite a lot if you start early! This may not be a huge concern when you’re 18 but believe me, when you pass 25, your concerns start to rise with every new spot and wrinkle. Of course it’s impossible to stay forever young, but there are plenty of things that can be done to prolong the youth of your hard working hands.

Top 5 tips for younger looking hands:

1. Moisturise Intensively: Apply hand cream every time after washing the hands and whenever they feel dry or dehydrated. It’s absolutely crucial for preserving your hands’ youth.
2. Apply Your Hand Cream Properly: The best way to apply hand lotion is to squeeze it onto the back of your hand and rub the back’s of your hands together. Then spread the lotion out with your palms to finish. You’ll end up delivering the bulk of the product to the part that needs it most.
3. Keep It Rich: The skin on the back of your hands is very different to the skin on your palms. The skin on top of your hands is much thinner and has less sebaceous glands, meaning it can become dry very quickly. In comparison, the skin on your palms is a lot thicker, so for moisture to penetrate this area a hand cream needs to be rich and full of moisture binding ingredients.
4. Gloves Are Girl’s Best Friend: I would recommend using a hand cream at night and putting gloves on top while you sleep. The gloves will protect against moisture loss. During the day apply moisturiser just to the backs of your hands (which are usually the driest) leaving your fingertips and palms grease-less.
5. Size Matters: If you are using an oil hand cream such as pure jojoba, then just one small pump would be enough. If you are using more of a cream based hand cream, then a 10 cent coin size should be enough. It depends really on how dry the hands are and what the consistency of the hand cream/oil/lotion is.
What are your best tips for keeping your hands looking young? Anything else that you’d add to the list above?

What Your Nail Shape Says About You

Did you know that when you meet someone you have about 3 seconds to make an impression?  Yep, people often make assumptions about us  before we’ve even said anything. So like it or not, how well you’re groomed, your clothes and how neatly you’re presented is significant. Nails are that small detail that can enhance that perfectly put together outfit and make a real impression.
In addition to that your fingernails, and more specifically, nail shape can say a lot about your personality. While there are many fingernail shapes, I list 7 of the most common below along with a rundown of what your nails say about who you are.
So behold my friends, it’s time for some serious nail reading! I’m even a bit scared as now after all these years of displaying my nails to public, you can learn so much more about me… and your favourite nail artist/nail Instagrammer too!

7 nail shapes & what they say about you:

1. Square: If you like square nails, you’re the type of personality who can manage subtle changes to the way things are. But if you had a choice, you’d always stick to the most convenient and comfortable option. You are also a bit stubborn.
2. Squoval: If squoval nails are your favourite, you have a fantastic sense of humor. You have an easy-going, easy-to-excite personality that finds no difficulty shifting from classic thinking to a more innovative, destructive one. Likewise, because you are an easy adopter, people like being around you.
3. Round: Round nails are the most low maintenance nail shape you can have. It allows you to move and move around without breaking it. So needless to say, it’s the go-to shape for most working women. You’re easy going yet very practical.
4. Oval: The next most practically shaped nail next to round nails, women who have oval nails have a combination of flair and practical personality. If you have this shape of nails, you’re intelligent, but slightly indecisive and gravitate towards classic and elegant options.
5. Almond: You’re practical yet creative and gravitate towards unusual, unique choices. You want things to stay functional but, you’re always inclined to incorporate some innovation in what you do. You are chic and sophisticated but you like to keep things real and have things your way.
6. Ballerina: If you like ballerina nail shape, you are the ultra feminine girl, who is very stylish and trendy. Without doubt, you love to impress! Surprisingly, this nail shape can suit almost every woman, but beware it can be difficult to maintain.
7. Stiletto: You’re one-of-a-kind, and probably the most creative and innovative person people around you know. Also, if you wear stiletto nails, I bet you’re not an office worker, because typing and paper work become simply impossible. Innovation and attention to detail are two areas in which you excel which is why you can find great success in the business world and always keep your friends and lovers happy!
Did you learn something new about yourself or your friends?

6 Ways To Save Money On (Polish) Shopping

If you’re anything like me, I bet you have a never-ending, ever-expanding nail polish and beauty wish list. With new exciting collections popping up almost every day, the only question is how to satisfy your cravings without breaking your bank account.
Here are my top 6 ways to do that!

1. Plan In Advance

You probably already have a wish list but if you don’t, make one! It helps to visualise your cravings and control impulsive buys. After you’re done with your list – review it and cull all polishes that you’re not sure about.  Your goal is to buy polish that you really need, i.e. limited edition, unique colours, ones that will be used often, etc.
What do I really need? Review your stash once again and see how many untrieds and dupes are there. Add them to your list as reminder to yourself that you won’t need any more any of these colours or brands.
How much money I can spend comfortably? This is a tricky one. Who has never exceeded their spending limit? However, by writing down a real world number right at the top of your Wish List you’ll be reminded to stay realistic and maybe re-think some of the collections you were about to buy.
Extra tip: a monthly polish shopping budget is a great idea. You may go over the limit in one month and buy less in the next. The idea is to avoid systematic overspending.

2. Stay Informed

Information is power, why not use it to your advantage? Define your favorite brands and shopping sites and subscribe to their newsletters. They will notify you on their special offers first, give you special discounts or even maybe issue a gift card for your birthday!

3. Always Check Clearance Sections and Discount Retailers

The first thing I check when I walk into Priceline, Sephora, etc. is the clearance sections. It can take time to dig through the piles of stuff but you never know what gems you can find! I found some many OPI polishes for $9 (normally $20) at Discount Chemist. When shopping online – always check the ‘SALE’ and ‘DEALS’ section – like here at Shopbop, Ulta and Nordstrom.

4. Know Where To Find Coupons, Deals and Sale Information

Coupons are a great way to save a little extra on your beauty purchases. Ulta almost always has coupons for non-prestige brands. Sephora and Nordstrom often offer gift with purchase. The best way to get coupons is to sign up for email lists and enroll in loyalty programs.
Unless the polish you are craving is a limited edition colour, it’s always a great idea to wait a bit until it goes on sale. Keep checking though, and it gets low in stock then get it. I missed out a few times on colours that I really wanted and it’s not the best feeling. The idea is to find the perfect balance between what you really have to purchase now and what can wait.
Will this item go on sale? You will always pay premium price if a collection has just been released. However, as new items become less popular they might go on sale and that’s when you strike! Make sure you keep an eye on when your favorite brands have sales. Back to point 2 – stay informed by subscribing to their newsletter.
Can I find a coupon for this item somewhere? If you combine sales with coupons, you’ll save even more. For the internet-savvy, E-Bay can be a great source of coupons. Also, sites that offer free printable coupons, like Coupons and Retail Me Not could be a good option. 

5. Plan A Nail Sale or Polish Swap

Every 6 months I review my stash. I gather all nail polishes that I haven’t tried and I feel like I can let them go in a separate box. Then I organise a tea and cake date with my beauty-obsessed friends and run a nail sale. I give it all away for a fraction of the real cost and some even for free.
These kind of events are great. First of all, you get to catch up with your friends and they get some new super awesome bargains. You get some extra cash to spend on new goodies or for whatever it is you need. For instance, last time via an event like this I raised some money to cover my husband’s medial expenses (not all, of course, but right now every bit counts).

6. Expand Your Shopping Universe

If you normally head straight to your favorite website, specialty store, or the mall when you need to buy something, consider these other shopping options that can save you a great deal of money:
Is someone personally selling what I need? E-Bay or even your favorite bloggers’ online Nail Sales tend to offer great things at much lower than retail prices. Don’t expect to find absolutely everything at these sales, but do check them out from time to time to add value to your shopping budget.
Can I find a better price elsewhere? Often I find that comparing retail prices to a couple of online stores can result in up to a 30% lower price. Various online stores have different prices. For example, here is Essie polish and there is Essie polish. See the difference?
In anticipation of the biggest sale of the year, I hope you find this article useful and don’t loose your mind at all the offers about to come at you from everywhere. Shop wisely my friends and save those hard earn dollars!
Now, your turn…
What are your best ways to save money on nail polish? Any awesome sales, reward programs or newsletters you swear by.

How To Store Nail Polish: 6 Do’s and Don’ts

Nail polish can be a sticky business! There is nothing worse than pulling out your favourite polish only to find that the formula has thickened or worse, the lid is completely stuck to the bottle. Just like other beauty products, nail polish requires a specific storage method to ensure longevity.


Most polishes have a suggested shelf life of two years. You can however, extend or shorten this by how you choose to store your polishes. High temperatures activate the solvents within the nail polish which gives your polish that thick and melted consistency. Keeping it in a cool place will prolong its shelf life and keep your polish smooth and easy to apply.
6 Do’s and Don’ts of storing your nail polish:
  • Do store nail polish in a cool, dark place with consistent temperature.
  • Don’t store your polishes near any sources of heat.
  • Do store nail polish away from direct sunlight. Light exposure can can promote discolouration or fading of the pigment.
  • Don’t store nail polish in the bathroom. The temperature is constantly changing due to the shower and your polishes will be exposed to humidity.
  • Do ensure that all of your polishes are stored in an upright position.
  • Don’t store nail polish in the fridge. Whilst some say that storing your polish in the fridge slows down the discolouration that happens as the polish gets older and reduces the solvent evaporation, it also causes the formula to thicken. Plus… who has room in their fridge for their nail polish collection anyway? I know I sure don’t!
There are so many ways to store your polish, whether it be in boxes, drawers, inside cupboards, or shelving units. And, if stored correctly, as per tips above, you can prolong the life of your beloved nail polishes significantly.

How do you store your nail polish? Any great nail polish storage tips we could add to the list?

Creative Ways to Use Your Nail Polish

Do you like painting nails? Do you know your nail polish is not only something to make your nails pretty but also a helpful stuff in our daily life. It can work on so many occasions. Those smart housewives must know some other usages or the versatile nail polish.

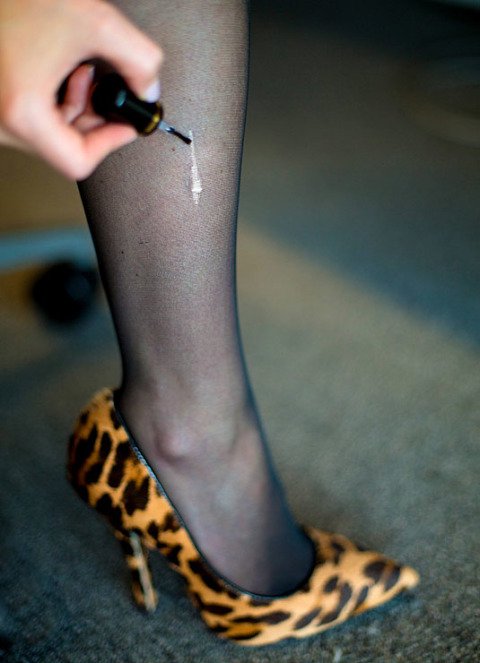
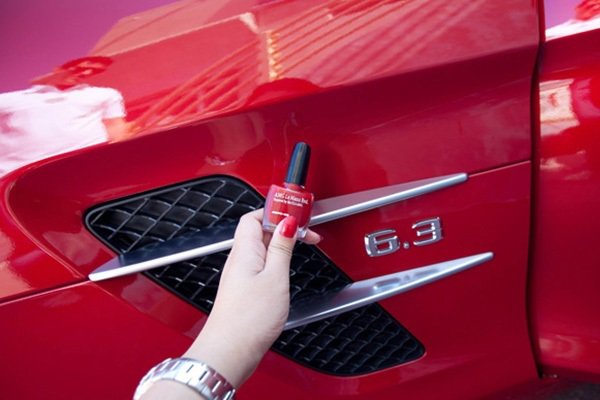
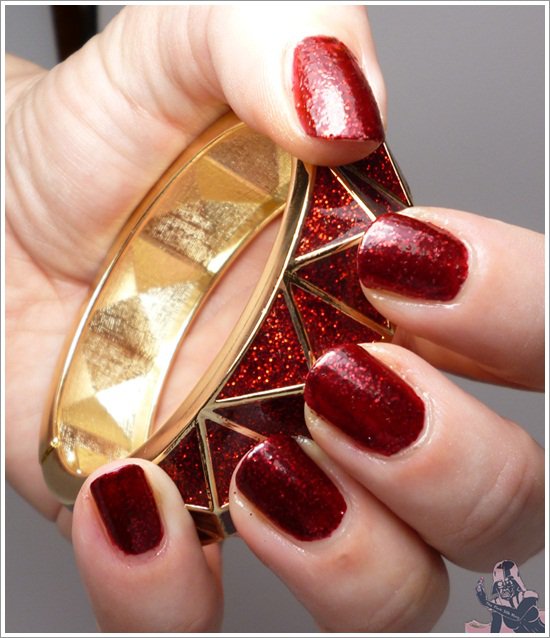
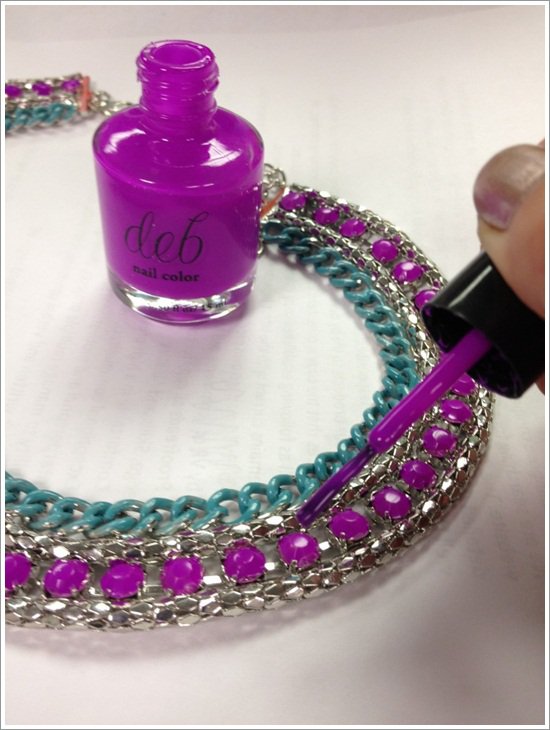
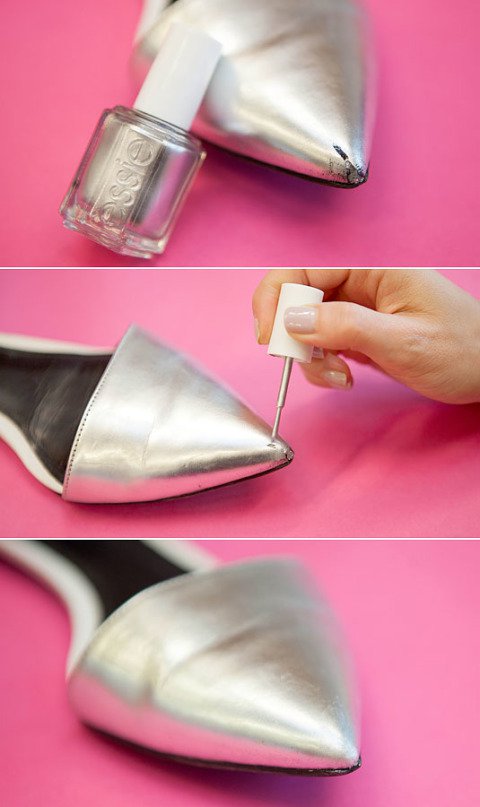
In today’s post, we are going to share with you some creative ways to use the nail polish. You can use you nail polish to make a colorful bracelet. Or, you can repair your scratches on your car and your pumps. When you find a run in your stockings, you can brush the nail on to your tights to prevent it become worse.

To Save A Run In Your Tights
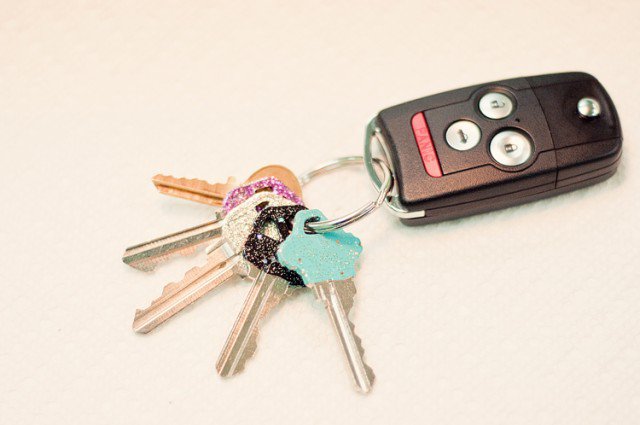
Stunning Keys
Stunning Keys
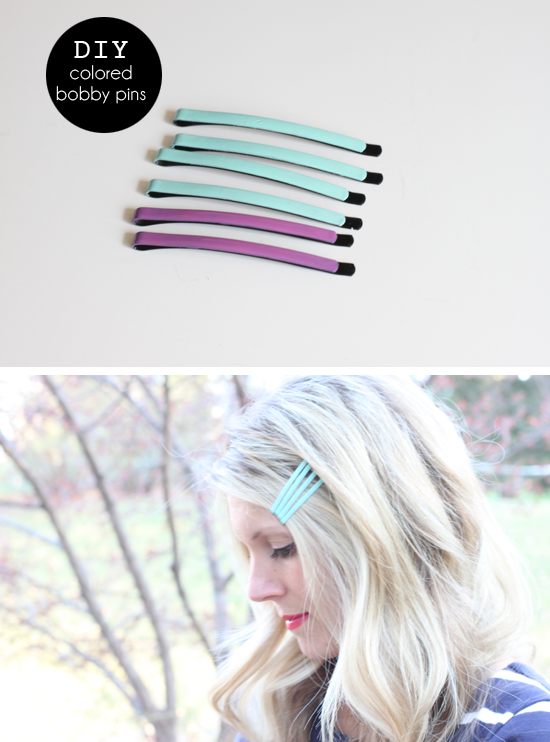
DIY Bobby Pins
DIY Bobby Pins
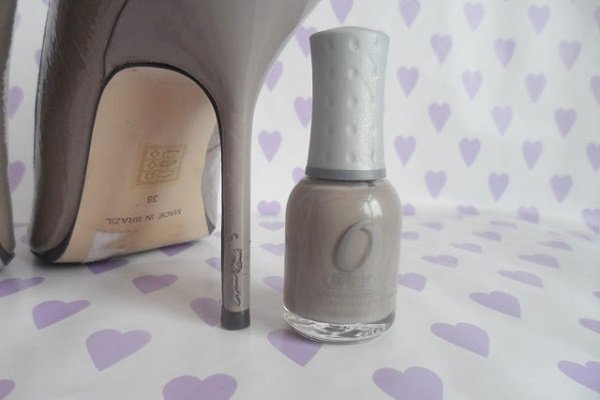
To Renovate Your Heels
DIY Phone Case
DIY Phone Case
DIY Pattern Purse
DIY Pattern Purse
To Hide Your Car’s Scar
To Hide Your Car's Scar
Glitter Bracelet
Glitter Bracelet
Colorful Necklace
Colorful Necklace
To Renovate Your Pumps