页面

2018/2/22

Smudge-Proof Eye Makeup Tips

Carefully applied eye make-up can help draw attention and accentuate a woman's most prominent features. But smudged make-up will draw attention for all the wrong reasons. What are some easy ways to prevent eye makeup from smudging?

Start with the Eyebrows
Darker eyebrows will stand out more prominently than fair-haired women with pale eyebrows. Prepare eyebrows by brushing them into place, removing any stray hairs with tweezers and trimming them into shape using cosmetic scissors if necessary and tidy them up even further. Use clear eyebrow gel or clear mascara instead of applying eyebrow pencil to eyebrows that can easily smudge.
Keep Eyeshadow in Place
Many brands of eyeshadow have a habit of coming off before the end of the day, and some will also disappear into the crease of your eyelids. If you are in the habit of regularly touching your eyes, eyeshadow will slip off. Switch eyeshadow brands if this happens to you and buy an eyeshadow primer. Apply the primer to help keep the eyeshadow in place longer without having to touch it up and try to remember not to touch your eyes.
Prevent Mascara from Smudging
Mascara is particularly prone to smudging, especially if your eyes water after chopping onions or even during vigorous exercise. An easy way to prevent mascara from smudging is to apply a thin layer of mascara to just your top eyelashes. Let the mascara dry and then apply a second coat if necessary. Or use clear mascara to accentuate your eyes without adding color that will noticeably smudge or run.
Apply Waterproof Makeup
Athletes and swimmers know the benefits of waterproof make-up, as they can continue with their sporting activities without interference. A good brand of waterproof eye makeup will help you to get through the day with confidence. But just remember to remove all traces of make-up by the end of the day. Otherwise, you will end up with clogged pores, and a spotty complexion when you wake up in the morning.
Proper application techniques can help keep eye makeup in place for hours. Be gentle with your eyebrows and apply a clear eyebrow gel or clear mascara. Use a primer to keep eyeshadow in place and to prevent it from creasing. Apply mascara on the top of eyelashes. Waterproof make-up is recommended get on with your day-to-day activities without having to worry about touching up smudges.Use clear eyebrow gel or clear mascara instead of applying eyebrow pencil to eyebrows that can easily smudge.

Various Types of Hair Extensions - What To Know

These lengths of synthetic or real hair are attached closely to your scalp. The purpose is to add thickness and/or length to your natural hair. When you go into a hair extensions shop or beauty shop to have these added, you will find that there is a variety of different types of hair extensions to choose from. You will not only have different ones to choose from but also the texture, color, length, and style. One thing to note is that real hair extensions are the more expensive of the two choices. Synthetic hair extensions are also harder to style.
Clip-on
This one does not usually require that you go to a hair extensions salon to have it done. It is the most basic type because all you have to do is clip them onto your own hair. If you want to have them dyed closer to your own natural hair you may want to have a professional do this so you can get a better match. This extension will generally only last for a day or night but you can use them as many times as you want.
Weaving
You can also have them sewn into your hair by a professional. Your natural hair is braided into light cornrows, as close to your scalp as they can get with the weft sewn into these braids. This is a process that can take a long time to do and can be a painful experience. It is also one of the more expensive forms found in the market. The up side is that it can last a long time.
Bonding
These will usually involve a long weft of hair, with track that can be as much as six inches long. The professional stylist will apply an adhesive to the roots of your hair before applying the extension. It is quick to do but normally does not last as long as other means of hair extensions. It is also referred to as gluing.
Shrink and micro links
For long-lasting hair extensions, you can have keratin tubing or metal rings added to your natural hair. Your hair will be attached to a mall tube or ring clamped onto pieces of your hair. The damage to your hair is minimal and there are not solvents or adhesives used that could irritate sensitive skin making this a popular method to use. The drawbacks are they can be hard to remove, they can loosen after a few washings causing some of the strands to be released, and add additional weight to your hair. This is not a process that is recommended if you have fine hair.

2018/2/10

How to save your lipstick 😂😂

How to save your lipstick 😂😂


Actually, You can choose a Smudge-proof lipstick!!!! Why not?


this one Smudge-free Matte Lip Gloss Long Lasting Liquid Lipstick for sale is $3.99/pc now, free shipping worldwide! 6 Colors Available !

Regular Nail Polish Vs Gel Nail Polish: Which Is a Better Product?

Whether you are dressing up for a party or a social gathering, you can always color your nails with a nail polish. Since a long time, there's has always been a difference between gel polish and regular nail polish. While both forms help you give a presentable look to your nails, the polish differs in its composition and the way it is used.
6ML Pink Holographic Nail Polish Glitter Hologram Effect Manicure Nail Polish
Composition
Known as varnish, regular nail polish is nothing but a colored liquid which is a little bit viscous. As far as the composition is concerned, these are made up of nitrocellulose dissolved in solvents like ethyl acetate or butyl acetate. Additionally, the polish includes silver halides, solvents, resins, plasticizers and coloring pigments. On the other hand, gel nail polish is composed of a base gel and is highly viscous in nature. It's a semisolid colloidal suspension in which the solid is mixed in the liquid. Once a coat is applied with a brush, the gel is dried or cured under a UV lamp.
Purpose
If you simply need to beautify your nails the way you desire, then it's worth investing in a regular nail polish. But, on the contrary, gel polish not only adds color but also shine and glow to your nails. Moreover, you can always think differently in case you prefer adorning fingers with nail-art. As you visit the marketplace, a gel polish kit is quite expensive when compared to a regular nail polish.
Usage
With a regular nail polish, it's not necessary to apply coats one after the other. The varnish dries up immediately once it's exposed to air or when the fingernails are kept under a fan. But, when you try a gel nail polish, you first have to apply a coat and then dry it under ultra-violet light. After some time, once the polish sets in, you need to apply another coat and repeat the drying process. This needs to be done to maintain the consistency and protect the nails from dust particles. While nail varnish can take 20 minutes to dry up, the drying time for a gel-based polish is as much as one minute.
Removal
In comparison to regular nail varnish, you may need to put in more efforts to remove gel nail polish. Once you have soaked your nails for 15 minutes inside a bowl full of acetone, you need to wrap the nails with an aluminum foil. Afterwards, you then have to lift the foil gently and check whether the polish has been removed. At the end, you need to rub your nails with the help of a lint-free nail pad. You would also have to re-hydrate cuticles and nails by applying a few drops of apricot cuticle oil.
Benefits
Regular nail lacquer actually prevents flaking and cracking of nails. This is not the case with a gel polish because the beauty care product protects nails from damages due to heavy lifting. Once the gel polish stays for a period of 2 or 3 weeks, the nails start growing naturally. Even if they get chipped off, the nail would not be prone to damages because the extreme end gets affected. Eventually, this aspect enhances the look of the nail bed as the polish offers complete protection. With nails protruding from the edge, you can always think about a different color and amaze everyone at a social event.
Nail Art
Finally, you can always create a marble nail effect once you apply a regular nail polish of your choice. As you seek the best way to paint your nails, acquaintances would certainly appreciate your creative idea. However, with a gel polish, you can think about a fine line nail art set in different colors.

How to Choose the Right Nail Stamping Plate

We girls go insane over artistic designs and patterns and there is no way to stop us. Besides, latest trends and immensely exciting Nail Stamping plates are not helping us calm down either. The intricate and interesting plates that actually take your breath away are setting their mark in a way. It's becoming impossible for us to resist it once we enter the store, isn't it guys? You probably want to buy all of it since the idea of having those unique and delicate designs on your nails makes you giddy and I completely understand why.
6Bottles Professional Nail Stamping Polish Set Nail Plate Printing Varnish Set
However, one must know certain things before they gauge on to just the beauty of the Nail Stamping plates and end up spending much more than you had decided.
• Size matters
You do not only need to see the size of the plates but also your nails. You must know that not all sizes are the same. The manufacturers counting of shapes and sizes differ, so if a certain plate of a brand is fitting you, it does not mean that the other brand's will. Measure accurately.
• The categories
There are basically three kinds on the plates, full nail images, small designs and designs on French tip. Usually the full size one is the easiest, you just need to precisely roll over the stamp, just to see the design perfectly staying on the nails.
Smaller ones tend to be complicated as it requires settling down on specific and neat spot, with delicate prints like animals, flowers and more. And the tip prints are harder than the rest two and one needs proper practice before applying it.
• Purchase quality
Nail Stamping plates or let's say the magical nail art are turning into a profitable industry. Naturally there's competition and manufacturers are certainly fighting for your attention. Make sure that you do your necessary research and get the best deal possible. If you purchase it online and feel the price is quiet low then be aware of certain defects here and there on the plate. One needs to be really tactful in buying Nail stamping plates or nail art stickers for that matter. I know quite a task, isn't it?
• Scrapers of Metal blades? A strict No!
Scrapers of these kinds tend to ruin the metal plates while you scratch through it. One can experiment using laminated card as it proves to be quiet user friendly and helpful. Purchase flexible and thin cards, or you can even use gift card, credit cards, pan scrapers or any membership card.
• Check out the social media page of the brand for satisfaction
Yes! It's essential and probably the most crucial part, as we all know that today digital media is ruling the world. We come to know about what's good or bad through it. So check if the brand page consists of several negative comments and whether if they are doing anything to resolve the issue.
If there happens to be happy comments like 'received the gorgeous plates today' or 'can't wait any longer to use this' etc, then it's a good sign. Also go through the bloggers post and what are they using and giving preference to. This helps you to take a detailed decision, a decision that you will not regret later.
Nevertheless, nail stamping plates are a beautiful thing, and I honestly don't know how would have I flaunted my master work of nail art without these amazing plates. So what are you waiting for? Get your hands on the prettiest one now!

Different Ways to Use Hair Extensions

Are you planning to buy Brazilian hair extensions, or do you have one way but trying to figure out the various ways to use it?
This post will help you learn the most awesome ways to use extensions. So, check it right away and know the 5 different ways to use your lovely extensions.
Women Long Full Curly Curled Wig Loose Fragrant Curl Wig
  • To add Volume to your hairstyle
If you are looking for adding an extra body and volume to your hairstyle, then clip-in extensions are just perfect for it! These hair extensions can add dimensions to almost every hairstyle, like messy buns and ponytails.
You can use the entire of it or just a few strands in order to achieve appropriate volume as per your preference. If you have healthy hair with decent volume, then using just 1 or 2 clip-in extensions would be enough to add the desired volume to your hairstyle. 
  • To Prepare Thicker and Longer Braids
If you have always desired for those perfectly long and thick braids then extensions can help you achieve that! You can buy high-quality extensions, like the Brazilian hair extensions that are an excellent solution for this.
Just add your extensions as per your preference and braid them into different hair updo like Dutch braid, fishtail braid, bow braid, mermaid braid, and more. Adding extensions will ensure that your braids are thicker, longer, and beautiful than before.
  • Add Colors Without Damaging Your Natural Hair
Love experimenting with various hair colors but worried about the damage that coloring can cause to your natural hair? If yes, then go for the option of colored hair extensions.
These are an amazing solution as you can add extensions in different shades ranging from lighter to darker to add distinct highlights to your natural hair. Most importantly, these extensions will help you get the desired hairstyle without damaging your natural hair. You can shop for Ombre extensions that will perfectly go with all hair types as well as will help you get glamorous look instantly.
  • Use Hair Extensions as an Accessory
If you are not able to figure out a perfect accessory for your hair, then hair extensions would be the best solution!
The Brazilian hair extensions are the best in quality and can be used in various forms. One way is to use them as your hair accessory. You just have to clip in different wefts to prepare a braided headband that is perfect for any special occasion or any festivity. There are various tutorials available online that you can check to know the various ways of using hair extensions as accessories in your beautiful hair.
  • To Get that Additional Length
Every woman likes styling hair, but when the hair length is short, then this can cause limitation to the styling options.
But the best solution to add length instantly to your natural hair is hair extensions. Whether you have chopped your hair or you are not able to grow long hair naturally, these extensions are just perfect to get that most wanted length. The clip-in extensions are very convenient to use and can be clipped to your hair instantly to help you achieve the desired length. You can select from varieties of clip-in extensions available, such as wavy, curly, straight, colored, and more other types.

2018/2/9

Top Tips for Nail Beauty

The nail art trend is seriously booming and many people have become very particular about nail beauty. You don't want cracked skin and tattered cuticles reduce the effect of your remarkable nail art. Follow the following nail and hand care tips to keep everything looking great.

Opt for milky hand wash
If your cleanser is clear, it has higher chances of drying your hands out and this is not acceptable. Stay away from soaps with harsh chemicals and opt instead for products with natural ingredients and antibacterial properties like tea tree oil.
Don't dip your hands in icy or hot water
Ice cold water causes redness from capillary vessels dilating and hot water will dry out your hands. This is a simple way of avoiding ugly looking hands.
Wear polish
Coat your nails with nail polish or nail wraps to seal and prevent damage. In that state, your nails are free to grow and rejuvenate without interruption. If you don't want any serious designs, reapply a clear and simple top coat very now and then. This is an extra because you will pick less at your nails when they are wrapped up or polished.
Lubricate with oils
Oils are super great for moisturizing and good for your hands too. Your hand cram should contain oils for moisturization.
Care for your cuticles properly
Your manicure will look old and haggard if your cuticles are disturbed. Cutting cuticles off makes your manicure look quite ugly and exposes your hands to infection. Every time you exfoliate your hands, nip off the hanging bits and leave everything else as is. Use an orange stick to push back your cuticles and make sure to keep them soft by applying cuticle oil frequently.
Moisturize after using sanitizer
Lot of alcohol is a fast way to dehydrate your otherwise moisturized and good-looking hands. Sanitizers are good but contain a lot of alcohol. After you have sanitized your hands, wait for the product to dry off then follow up with a moisturizer.
Use sunscreen
Your face and hands will wrinkle and burn at the same pace. Applying only sunscreen might be drying so add some moisturizer to keep everything even. When you keep your hands safe, they will stay looking radiant and your nails will be beautiful.
Anti-aging face cream works
Anti-aging cream will help improve elasticity during manicures. Stop your hands from wrinkling up and apply some anti-aging cream on the back of your hands.
Be gentle with your hands
Your nails are not an alternative for wedges, pliers, hammers or scrapers. They are not made of titanium and are definitely susceptible to serious breakage and damage. Everything you can do with a tool should be off limits for your nails. Take advantage of what is available and don't stress your fragile nails.
Use a mask
Moisturizing nail wraps are also good for your hands and nails. Nail masks are sold in beauty stores, purchase one for this procedure. After slathering the mask on your nails, over with a plastic wrap and place a warm towel on top for five minutes. The heated mask will penetrate for deep moisturization.
Make sure to utilize the tips above to keep your hand and nail beauty on point all the time. This way, your confidence will be boosted and you confidently wave and shake hands.

2018/2/6

Why Nail Art Is So Popular

Women all over are going crazy over nail artistry. It is like meow!; look at my lovely nails, people! One just have to go to Pinterest to realize that nail art is popping up all over the show. It can also be seen on various nail art blogs, Twitter pages, as well as You Tube tutorials. Why would nail design fashion be so popular all of a sudden?

The Reason For Nail Artistry's Popularity
In a large way, you've got to thank the fashion industry for making nail fashion what it is today. Just thinking back to the fascinating catwalks that were led by various designers in London during the autumn/winter season 2012, will make you realize just how much emphasize was being placed on unusual looking nails.
Different style nail creations were admired by all who attended as the models show cased the most unusual designs such as the black and blue houndstooth patterned nails by Henry Holland's team. Then there were nails featuring ghosts and eggs as well as other motifs being displayed by Meadham Kirchoff's models.
Another reason for the recent popularity of nail styling could be attributed to the sudden obsession with nail polish, where women were looking for something else besides just ordinary nail polish. Besides, the New York Times reported an increase of 67% in nail polish sales in America alone.
It goes to show that nail art is an inexpensive way for women all over to make a fashion statement about themselves. Retailers seem to think that this new craze is womens way of beautifying their hands and fingers much like they would have done with diamonds in times gone by. Only now, it is deemed so much safer in that their chances of getting robbed is very slim in comparison.
History of Nail Art
If you think about it, you will see that nails beautification was a lot less glamorous before 1920 as an abrasive powder was being used to help your nails to shine while various types of stains were used to add colour to it.
Then, Charles Revson became everyone's favourite as he developed the very first opaque nail polish back in 1930, which in turn gave birth to the well known Revlon cosmetic range.
Nowadays, women prefer something more unique such as nail art. More than ever before, women are looking for the next best thing with regards to nail art. You can bet your last few pennies that nail art will increasingly become popular due to the buzz that is being created on various social media platforms such as Tumblr, Facebook, Twitter, Google+, and others.
Who would want to be left out when it comes to showcasing your own nail art on YouTube or Facebook. Sporting unusual nail art that is not only unique but wildly different will surely get you noticed, and that without having to spend an absolute fortune on it.

Basic Nail Art Tools for DIY Beginners

So you want to try your hand at DIY nail art but where do you start? The first thing you need to do is get your hands on some basic nail art tools. This is a list of my 5 essential DIY nail art tools.

The essentials are: a base coat (to prevent nail discolouration and allow your nail polish to glide on smoothly), nail polish, and a top coat (to ensure your manicure lasts for more than a day). I like to use a quick drying top coat cos that saves oodles of time and is so convenient to use, but it's also good to have a normal top coat or clear polish in hand for certain more complex nail designs.
After trying loads of different brands, I've found that it's so important to invest in good quality nail polish. These are more expensive but they're worth it cos they last longer, dry faster and don't get lumpy. I've had such bad experiences with cheap nail polish that now I'm just sticking to brands that I've used before (and like) and reputable brands. Orly, OPI, China Glaze, Sally Hansen and Essie are some of the good ones. It's also a good idea to test out polish from a brand you've not tried before buying it.
2) Nail dotters
Nail dotters help create dot and circle patterns. I use these all the time to create simple polka dot designs. They come in a variety of sizes. Starting out, it'll be good to get your hands on one that has a medium sized round nib on one end and a small one on the other so you can choose the size of the dots you want to create.
HOW TO USE: Find a plastic sheet and drop a few blobs of nail polish onto it. I like to use name cards that are hard and feel a bit plasticky for this cos they're small and disposable. Dip the round nib of your dotter into the polish. Try doing a few dots on the sheet/name card till you get the right size and consistency that you want. Do the same onto the surface of your nail. Be careful not to use too much pressure, that may cause the dots to look deformed. Remember to clean them after use and dry thoroughly. These tools are made of metal and susceptible to rusting.
MAKE YOUR OWN: It's also easy to create your own nail dotter using stuff you have lying around your home. Bobby pins are a cheap and convenient alternative. Just bend them out straight, and use the round tips at the end like normal dotters. Because all you need is a round end, you can use anything that resembles a dotter, like the back of an eyeliner pencil cap, for example.
3) Nail stripers
These, to me, are an absolute essential. They are nail polishes that come with a long, thin brush rather than the usual flat and broad ones. I use them for painting lines and adding random flicks of colour. They are so easy to use and very versatile. I recommend getting two colours, white and black, when you first start. Brands like LA Colors have a wide range of colours and come pretty cheap, so have fun with it!
If you don't want to have to buy a new polish every time you want to try another colour, you could alternatively get a nail striper brush. However, not all brushes are good for nail polish. I've tried nail polish on a few and they completely ruined the hairs on the brush. Use water-based nail paint if you must. This makes it much easier to clean the brushes. If you've used nail polish, use acetone, some soap water and a paper towel to clean your brush.
4) Stationery tape
Ever wondered how DIY nail artists create super neat and straight lines and stripes? Using tape you can create many different geometric and striped designs.
Stationery tape is one of the best tools EVER for nail art. Any sort of normal scotch tape is fine, but you can experiment and see which give you the best results. They're great for creating neat lines and geometric shapes. Just cut the tape into the desired strip/shape, paste it onto your nail and paint over. Easy as that!
USEFUL TIPS:
  • Always make sure that your base nail polish is thoroughly dry though. Use a quick-drying top coat like Seche Vite if you don't want to wait.
  • Cut the tape before you start painting your nails so you avoid smudging when you try to cut it with wet nails.
  • Paste the tape somewhere where it'll be easily removable so that you don't get them stuck when you want to paste them on your nails.
  • Use tweezers to remove the tape to prevent accidentally messing up your nails.
  • If you mess up, you don't have to start from scratch again. Use a nail art brush and touch up where necessary. This usually does the trick.
If you're really serious about doing nail art, you might want to consider investing in a good set of nail art brushes. The main types of brushes for nail art are fan-shaped brushes, flat brushes, flat angled brushes, thin brushes (for detail) and long stripers. These brushes can be purchased conveniently (and rather affordably) in a set. The Bundle Monster New Pro 20pc Nail Art Design Brushes from Amazon is a pretty good bargain and comes with a dotter.
MAKE YOUR OWN: You don't need to use nail art brushes for nail art, you could even use your usual paintbrush. Just trim it to the shape you desire and use it like a nail art brush! It's convenient and not to mention cheaper to start with a paintbrush.

2018/2/4

7 Tips for Making Your Nail Polish Last Longer

For many women, applying nail polish is part of their grooming routine. Such women don't feel presentable if their fingernails and toenails are bare. So even though a manicure and pedicure consumes at least half a day's worth of time, these women consider it time well-spent. Some women take it even further by using their nails as canvass for nail art.
A typical problem with nail polish, however, is that while it takes a lot of time to apply properly, you can expect your polish to stay flawless for only a couple of days or so at best. Your nails can even chip a few hours after you've applied them. This can be very frustrating, and a lot of women have sworn off polishing their nails after such an occurrence.
But it is possible to prevent your nail polish from chipping and make it last longer. You can do so with these seven tips:
  1. Clean your nails first before polishing them. Wash your hands and then soak your fingertips in lemon juice or apple cider vinegar. This will remove the excess oils from the surface of your fingernails. With these natural oils stripped off your nail bed, the polish is guaranteed to stick to your nails instead of sliding off. The acidic wash will additionally brighten your nails and remove any residual yellow tinge. To prevent any more oils from getting on your fingernails, avoid using or holding anything oily prior to polishing.

  2. Always apply a base coat first. The base coat serves as a primer and a buffer between your nail bed and the polish, thus allowing the color coat to stick to your nails but without staining them.

  3. Rather than applying your colors in one thick coat, brush them on in thin layers. And then, wait for each layer to dry before applying another coat. It's a tedious process but this method will make your nail polish more durable and resistant to chipping. For best results, brush the polish horizontally across the tips of your fingernails.

  4. Protect the color coating of your fingernails with a top coat. To harden this top coat and help make your nail polish last longer, soak your fingernails in cold water for ten minutes after applying the top coat. If you have time, you should make it a daily habit to brush on a thin layer of top coat on your nails.

  5. You should also moisturize your hands daily after your manicure. Oil may be bad for the nails before the manicure, but it's essential after you've put on your polish. A commercial hand lotion is good enough, but you'll get better results if you use natural oils like olive oil. If you want to pamper your hands even more, you should invest in a bottle of argan oil.

  6. Take good care of the tools and products you use for your manicure. Seriously, your manicure is only as good as the tools and products you've used to attain it. So, store your polish in a cool place, preferably in the refrigerator and keep your nail brushes and files clean. Never shake your nail polish because doing so will create air bubbles in the product. Air bubbles can contribute to your polish easily chipping off your nails.

  7. Never use your fingernails as tools. It goes without saying that sudden force on your nails will do more than just ruin a good manicure. It can also damage your nail bed itself. Don't do it.
It's definitely frustrating to see chips and scratches on your fingernails after you've meticulously manicured it. But if you apply your nail polish and care for your nails properly, your manicure will last for weeks.

The Types Of Nail Polishes

Nail polishes have been around even before I was born. A swipe of color on your nails bring a new dimension to your style. With the advent of various nail arts and YouTube videos allowing access to many creative options, you can virtually create many designs on your nails. However, for those of you who are just starting out with nail polish, you might get confused with certain names and types. With that being said, here's a 101 on the types of nail polishes.

TYPES OF NAIL POLISHES
1. Finishes
Nail polishes come in different finishes. They range from matte ones to glittery ones. Matte polishes are those polishes that has little or no shine in them, and they often look flat. They are one of the most classic polishes that one can pick up. If you are a big fan of classic polishes, then this is recommended for you.
Cream and Pearl Finishes contain a little shimmer that reflects beautifully when light is shone on them. They are a step above the matte polishes. Cream and pearl finishes are one of my most favorite types.
Metallics are those that appear metallic or foil-like on your nails. The most common colors are gold, bronze and silver. They are great on those days where you want to feel glamorous.
Glitter polishes are the type of polishes that just spell glamour. They come in different textures and patterns. Some polishes contain finely milled glitters and some contain chunkier ones. The only downside of glitter is that it is really difficult to remove.
2. Base Coat
A base coat is essential in preparing the nails for color. It protects them from discoloration that is brought about by bold colored polishes. A base coat often comes as a colorless finish. You can get a base coat that contains nail strengthening elements that would help keep your nails strong.
3. Top Coat
A top coat is what you put on top of your colored polish. It helps prevent nails from chipping and it also adds additional shine on your nails.
4. Quick Drying
If you don't want to spend so much time painting your nails and waiting for them to dry between layers, a quick drying polish is the right choice for you. It is still recommended to allow at least 15 minutes of drying time, in order to avoid any annoying nicks and dents. Remember that the thinner you apply your polish, the faster it dries.
5. Growth Enhancing
For those who have dry and brittle nails, a growth enhancing nail polish will help keep your nails strong. They contain proteins and fibers that aid in faster and healthier nail growth.
Before you head out and stock up on your favorite polishes, find out if you have any problems with your nails. All it needs is just a little TLC. You may choose to treat your nails and remember to allow at least a couple of days for them to breath before applying your next nail color.

Essential Nail Art Supplies For a Home Manicure

Every woman has the right to beautiful nails. But trips to the nail salon can be time consuming and costly. Thankfully, sitting in a crowded nail salon is not the only way to get a manicure. With the right nail supplies, you can get a professional looking manicure without leaving the house. Here are some essential nail art supplies for the perfect do-it-yourself manicure.

Disposable Nail Supplies-
A beautiful manicure starts with maintaining the health of your nails and cuticles. So cuticle remover, nail hardener, polish remover, and nail color are all must-have nail supplies for DIY manicures. Cuticle remover softens the cuticles so dead skin can be easily removed. Polish remover removes old nail polish from your fingernails. Nail hardener strengthens and protects the nails. And polish gives the nails a salon-finished look. 
Portable Nail Station-
No more shuffling through a cluttered cabinet to find misplaced nail supplies. A portable nail station offers you a convenient and organized place to store your nail polish, cotton balls, and polish remover. Some nail stations even come equipped with small stands to support your hands and make doing manicures easier.
Nail File and Cuticle Stick-
A cuticle stick is used to push back the cuticles, and remove the dead skin. Injured cuticles can lead to bacteria growth, so be careful not to damage them when using the cuticle stick. Push the cuticle back gently, angle the stick, and use light circular motions to prevent damage to the cuticles.
Nail files are used to shape and smooth the rough edges of the fingernails. Nail files can be purchased in ceramic, glass, and metal. You can also buy emery boards. However, emery boards are not meant to last, so in the long-ter they may not be as cost-effective as other types of nail files.
Nail Buffer-
A nail buffer is used to remove ridges and pits from the surface of the nails. Buffers also polish the fingernails to gives them a smooth healthy appearance. Buffing should only be done once a month. Too much buffing will cause damage to your nails. When you buff your nails, make sure they are clean, dry, and polish-free.
Do you want beautiful nails? Learn more about nail products that can help you get the strong, healthy nails you deserve at Beautybigbang.com

2018/2/1

Nail Art Design Ideas For Beginners

Followed by clothes, hair and shoes, the next trendy item is nail art. It's getting popular by the day, as it enables girls to enjoy the attention their nails bring in. Nail art requires creative designs, making use of various art forms.

Many may be in awe of nail art designs, yet apprehensive of creating designs on their own nails, as they consider that to be a difficult job. Thankfully, it's not as that difficult as many imagine it to be, though it requires a bit of patience and some practice. Here are some easy art designs for your nails, prompting you to get started before graduating to more complex designs:
Effortless Nail Art Designs for Novices:
Alternating the Colors:
This is the simplest to accomplish, needing minimum effort. Simply use different colors for each finger and get them noticed.
Use of Effect Polishes
You can get nail polishes for creating many effects, such as Crackle effect, Magnetic effect, Croc effect and Color changing etc. You'll find them easy for quickly giving your nails a different look.
Cat-Eye Gel Polish
Water Decals/ Nail Wraps/Nail Stickers
You can also get numerous ready-to-use nail art designs, including water decals, full nail wraps and nail stickers. You can get these with instructions for use, and beginners will find these easy to follow.
Skull Water Decals
Nail Art Deign With Stripes
Stripes make your nail look attractive. You can create stripe with the help of an art stripper, otherwise you may make use of a slim brush.
Holographic stripes
Dotting Manicure
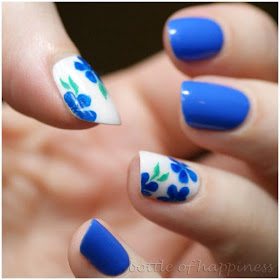
Dots look stylish with simple looks. You may use dots on nails to create flowery designs. This is probably the simplest and the first step for nail design without any templates.
Nail Dotting Tool

Polka Dot Heart Nails
Pink always looks cute, be it any part of year. For creating this design, leaving your ring finger, dust all your nails in pink. The ring finger is to be painted white, followed by heart-shaped polka dots with the help of a toothpick. Make dots with pink in different shades and finally apply a top coat to seal the design.
66+ Best Valentine's Day Nails Designs for 2018-pic6
60+ Best Valentine's Day Nails Designs for 2018
Nail Art with Rhinestones
You could easily add some bling to the nails, and rhinestones are wonderful for getting a party look.
Nail Rhinestones
Braided Nails:
Fishtail braid manicure - Getting this look is easy and you can surely get it right if you have some patience. You'll need three nail paints of different colors, which would overlap. You have to give time for each layer to get dried up and it's over.
Chocolate Nails
This is another very easy design. You just require nail paint in chocolate color and a few decorations, such as hearts (perhaps you'll find busted hair clips handy). Use nail glue to stick them together and put in golden glitter nail paint on the thumb and pinky.
Nail Art Studs

Tips with Glitter Gradient
For a fresh look, try glitter gradients. Paint your nails with black paint and with help of sponge add fuchsia glitter nail paint. Do apply a top coat after it gets dried.
Chameleon Flakes
Water Drops/Few Drops Nail Art
For getting this look, you make a maroon to purple gradient and follow that up with a matte top coat to cover it. Allow it to get dried before adding dots of plain nail paint with help of a toothpick on single side of nails.
Digital Nail Art
These designs simply look great if executed appropriately. First, you paint the nails in white and allow them to dry thoroughly. Next, with help of a black stripper pen draw black lines and fill in some areas with diverse color, leaving some areas white. To get an even better look, you may need to draw black lines once again. After it has dried, apply quickly a drying top coat.
Mix match nails
Mix and match nail give a very chic and terrific look. This can be achieved by applying yellow paint on the middle finger plus thumb, the pointer finger in black will have white polka dots, the pinky will have black and white lines, and the ring finger will have a graphite glitter color. Once you are done with nail paint, apply a top coat.
Feather Nail Art
It's getting trendy to have real feathers on your nails. Just paint your nails and add feathers on painted nail while the paint is wet. Give it some time to settle down. Then, trim the feather in the shape of nails and finally apply the top coat.
Chain and stud nails
For getting such nails, you need to paint these in two colors and then add chain and studs over them. You would also have some animal print on the pointer and pinky finger.
Steel Nail Beads
Glitter nails with dark-colored tips
This look is achieved by painting your nails with glitter polish and adding thin dark-colored tips. Finally seal the nails using a superior top coat.
Gradient with stamping nails
For getting this design, just make gradients using varied colors on all the nails, stamp them with your preferred design, and apply a top coat at the end.
Nail Stamping Plates
Glow in the dark nails
You'll find these superb when going for a night out. These are special nail polishes formulated to glow in dark.
Glow in the Dark Powder for Nails